
Here in Colorado, we dealt with a blizzard in March that dumped 20" of snow on us - more than the previous winter storms this year. Needless to say, I am ready for Spring. Spring is officially here, but someone needs to tell Mother Nature that! Of course, with Spring on my mind, I had to create a box with a Spring theme to enjoy! Here is the outside of the box:

I confess that I was very bad about getting photos taken of each process. The camera never seems to be upstairs when I am working! I started with a regular cigar box and painted it with a variety of Liquidtex Acrylic Paints, including these colors:

I mixed colors together and painted the entire cigar box. I then lightly dry brushed some gold metallic paint over the top of the previous colors:


Now it was time to decorate the top. Using matte Medium I collaged several different papers I had in my stash onto the painted box top and the insides of the box. I cut out several images from various papers and adhered them to the collage.

I stamped several B Line Designs images onto acetate with Archival ink and let them dry overnight. They were then adhered to the collaged papers.


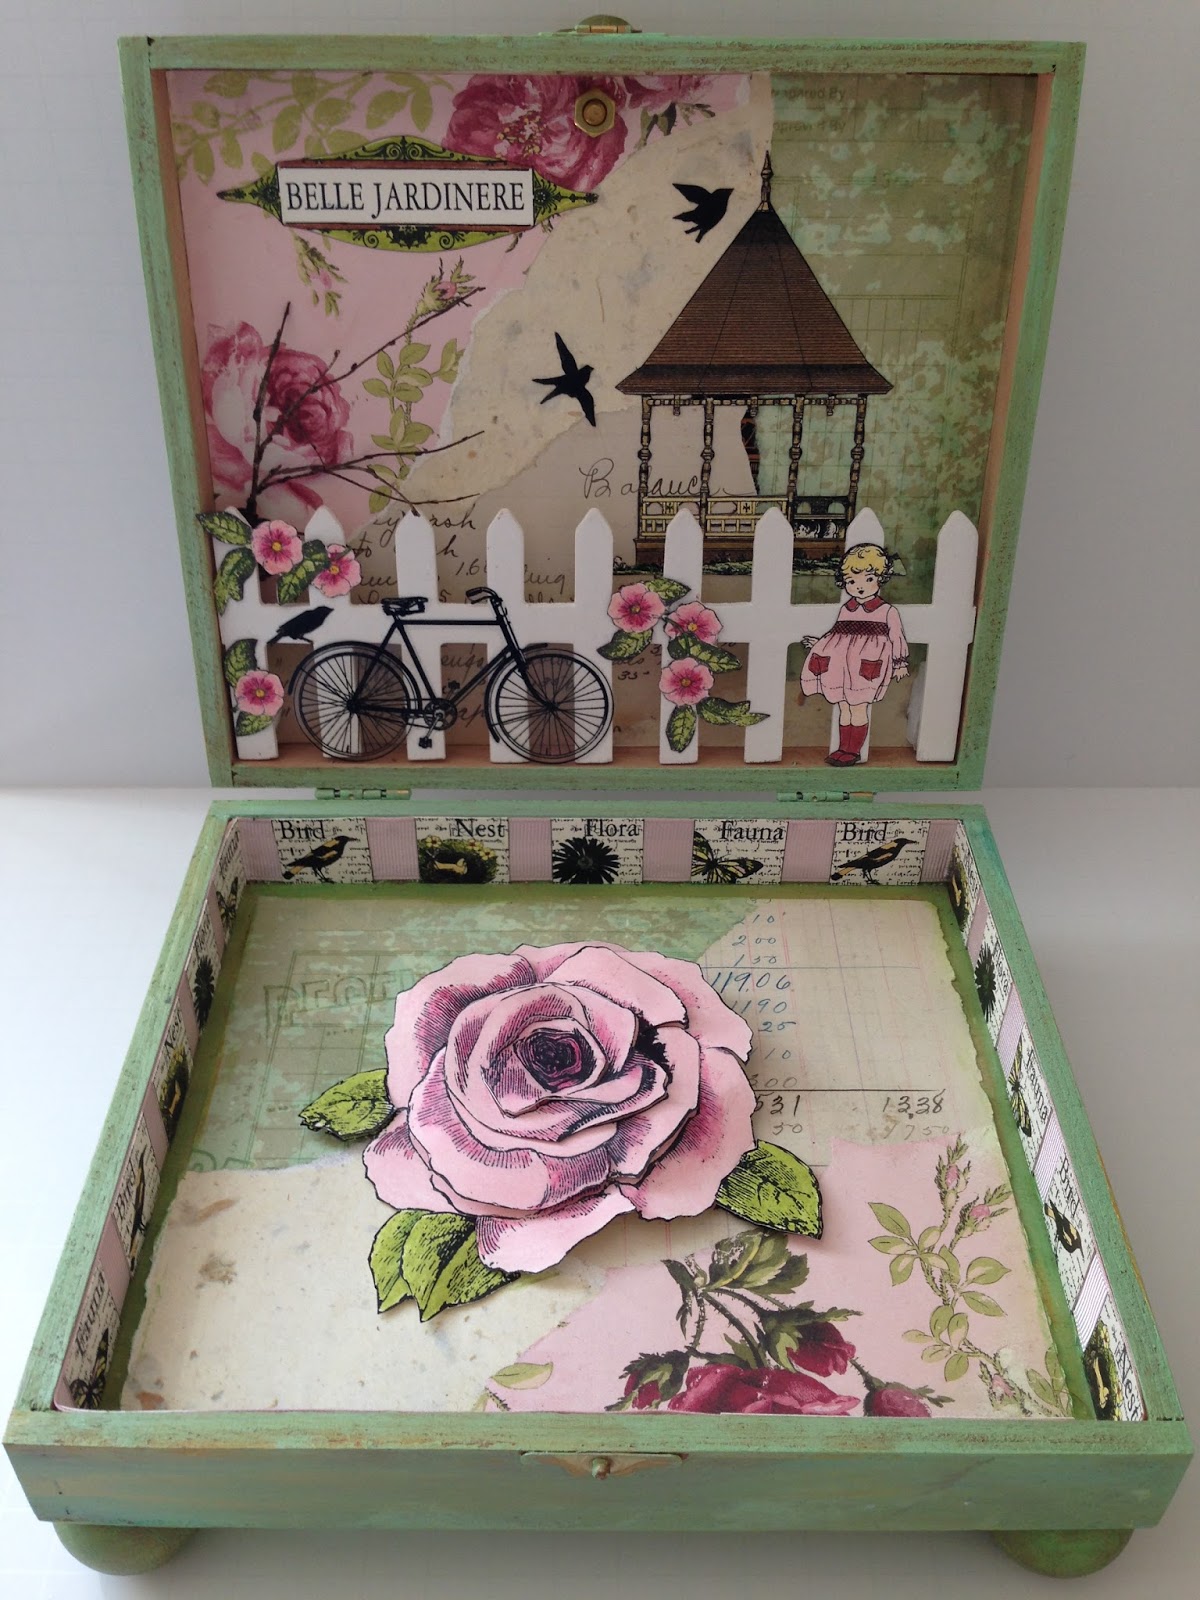
For the inside, I decided to create a Spring scene using papers and B Line Designs stamps.

I collaged more papers and adhered them with matte medium as I did with the papers on the cigar box top. The images of the little girl, the gazebo, the birds, the "Belle Jardiniere" sign and the flowers were all stamped in black on cream scrap card stock and fussy cut (oh, how I love to fussy cut - for real!) I colored all with colored pencils, cut them out and adhered the sign, the gazebo and two birds over the collaged paper.
The lid had a bit of depth to it, so I painted and cut a wooden fence from the hobby store to fit inside the top of the cigar box. The girl, the flowers, one bird and the bicycle were stamped again on acetate and were then all adhered to the fence. Finally, with the addition of a small branch from my yard, the inside top of the box was finished. Here are some close-ups:


Now for the inside bottom of the box. It also had some depth to it, so I was able to add a dimensional large rose I created after the box was collaged:

I stamped the rose three times on scrap cardstock and layered it with foam tape to give it dimension. Here is some of the detail:

I used a wide pink ribbon on the side edges of the box and adhered some small images from a B Line Designs cube to finish the inside bottom:

Hopefully this photo shows the ribbon and images around the entire inside edge.
Now to add the finishing touches. I added a green knob purchased at the hobby store to the box top after drilling a small hole in the top:

I painted some partially round wooden knobs, using the same colors of the box and adhered them to the bottom of the box for feet:


I am pretty happy with the end result. It will sit in my bedroom in an open position so that I can enjoy the Spring scenery!
Can't wait to see what all of you create!
Susan