Showing posts with label Tim Holtz Distress Inks. Show all posts

Saturday, November 22, 2014

Layering Stencil:Embossing

Seems hard to believe the holiday are upon us and we have arrived at the 16th - yes 16th - Challenge for the Compendium of Curiosities III Challenge!  This challenge proved to be a fun one as always!  This time it is sponsored by our friends at The Funkie Junkie Boutique who have a $25.00 gift awaiting one lucky randomly chosen winner!  Tim and Mario have provided yet another "WOW" prize package for the winner chosen by the Curiosity Crew.

All of us at the Curiosity Crew have been so amazed at all the talent out there!  Thank you to each and every one of you who have been participating with us for all the challenges.  Did you know it is never too late to join us?  You can purchase your autographed copy of Tim's Compendium of Curiosity III book here.  The go to Linda Ledbetter's site to learn all about the rules.

This challenge can be found on Page 50 of the Compendium of Curiosities III book.  Here is the project I created for this challenge:


I decided to use the Festive Layering Stencil which went well with the Christmas-themed tag I wanted to create.  Here is the tag before I added all the embellishments:


As you can see, I stenciled the bottom and the side edges of the tag, leaving the center open.
Now to embellish the tag...  I die cut the Prancing Deer from cream card stock and colored it by blending Antique Linen and Vintage Photo Distress inks onto the deer.  Then I created two pinecones from brown paper using Tim's Pinecone die.

The "25" embellishment, the bells and ribbon and the "Merry Christmas" came from Tim's Christmas ephemera pack.  After adhering them to the tag, I added a Mirrored Star just above the number "25" and to the bottom right corner of the tag, a Gumdrop to "Merry Christmas" and I cut around the bottom of the bells and attached the bells and ribbon ephemera to the deer's neck.

I also used a Tidings Token that says Christmas Wishes" and attached it to a hand-made chain using jump rings.  The first jump ring is threaded through the knot in a red acetate ribbon bow I made for the top of the tag.  I adhered two die cut pinecones and 3 small "real" pinecones that I had in my stash just above the Tidings Token.

The last piece of ephemera I used was a snowflake that came in the ephemera pack:


There you have it!  This technique is quite simple yet striking.  We hope you will pull out your stash and get to creating!  We can't wait to see what you make!

Susan

Friday, February 14, 2014

Thanks for the Lift!

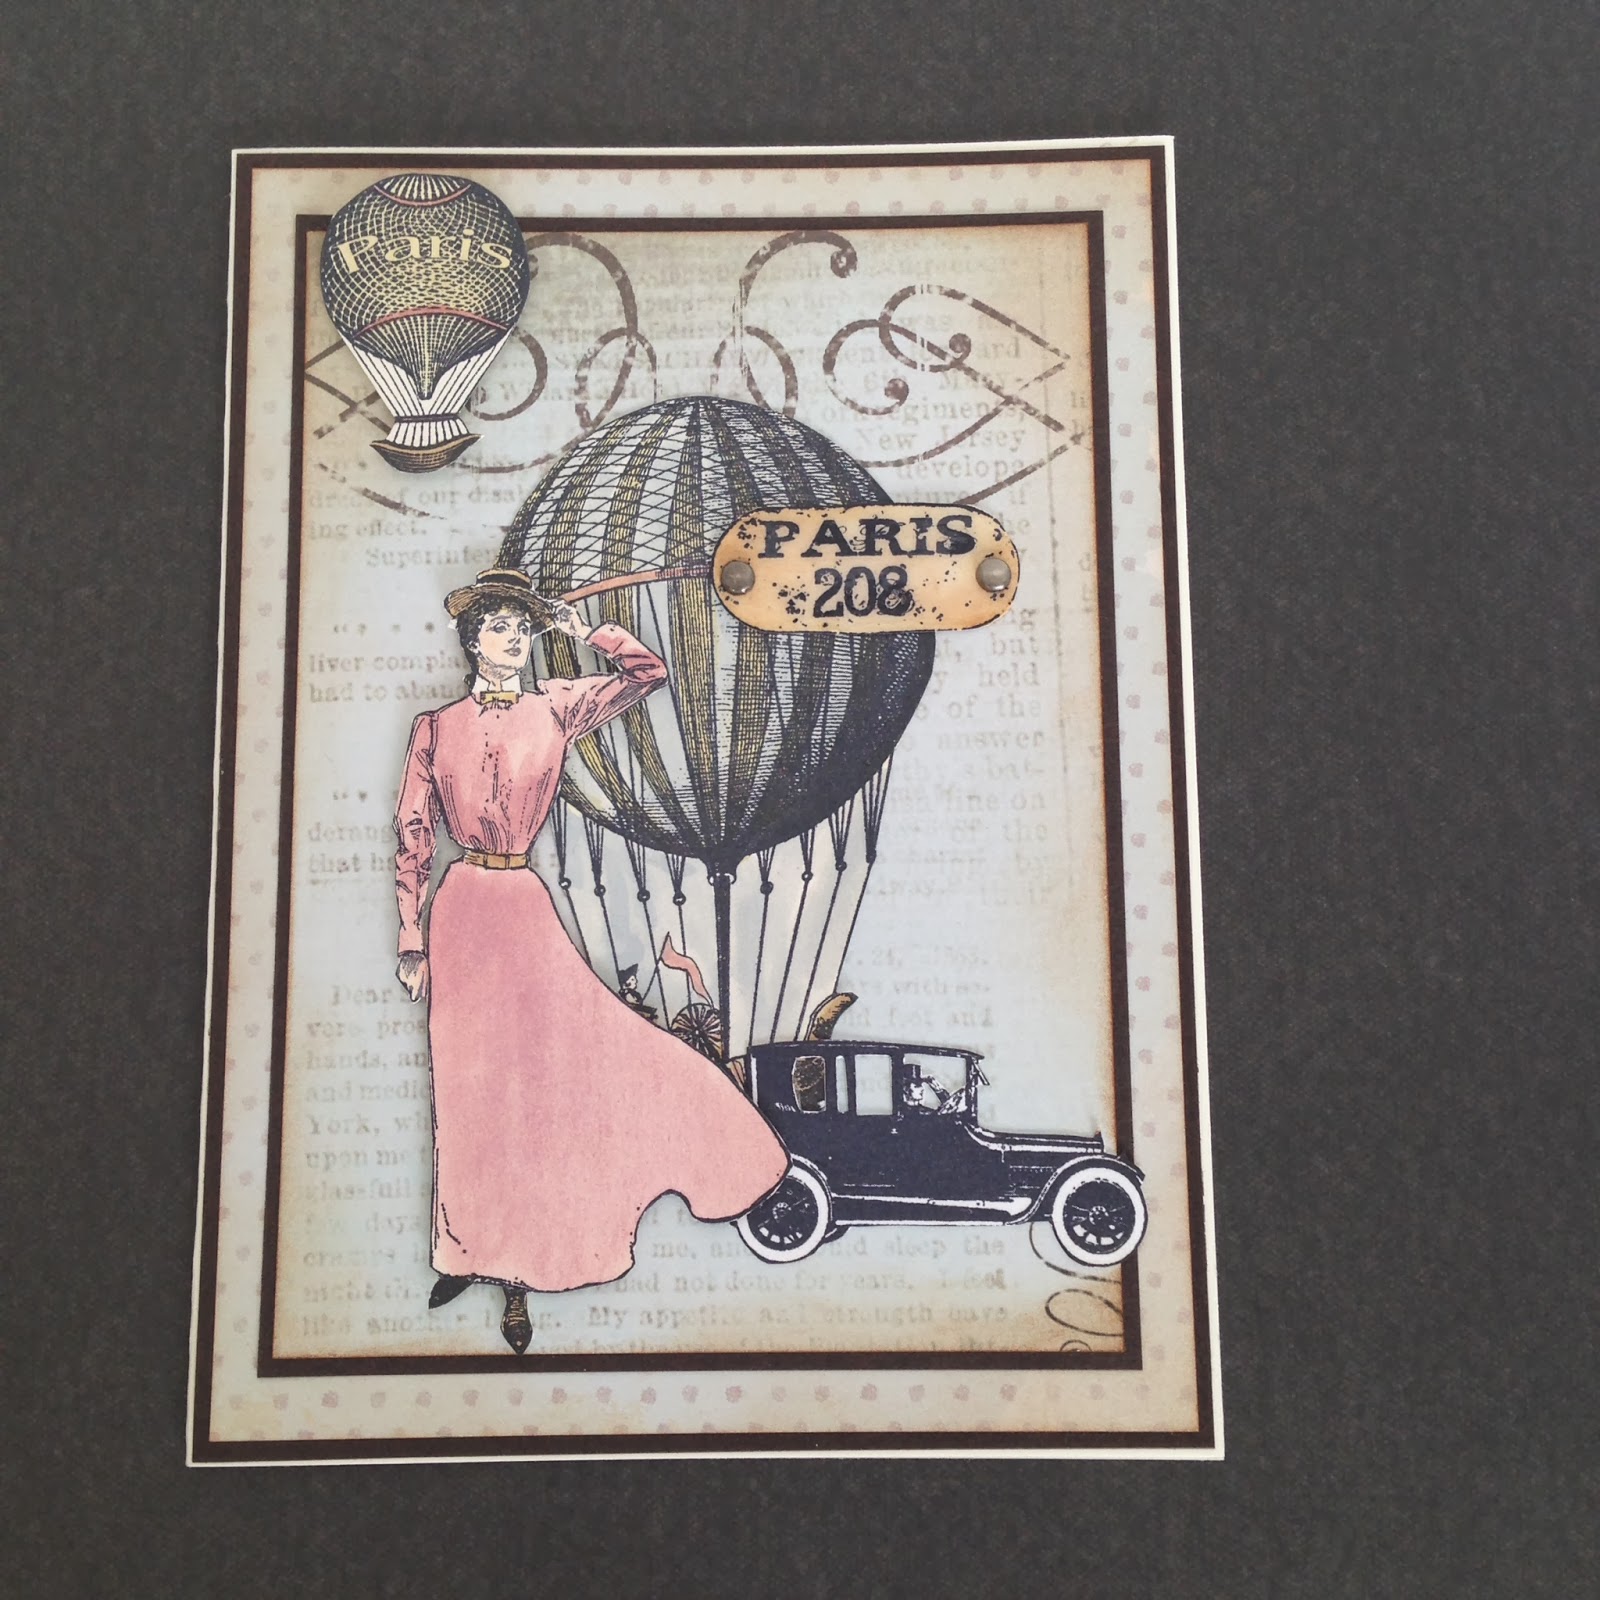
Wow!  My first blog post ever!  I am so excited to start this new adventure and grateful to the wonderful artistic friends I have made over the years who have encouraged me to do this.  There are so many people to thank that I could go on forever, so I decided to make a card to express my gratitude to all for helping me so much.  I hope you all know who you are and how much I love you guys!


All the stamps I used are by B Line Designs.  The paper is by Ruby Rocket, the Mother Nature collection.  I stamped Alexandra, Hot Air Ship, Paris Air, Paris from the Enameled Plate Cube and the car from the On the Road Again cube onto scrap cream cardstock.

I absolutely LOVE to watercolor with Tim Holtz's Distress Inks!  I smudge some color from the ink pad onto a craft sheet and spritz a bit of water next to the ink.  I then pick up the ink along with a bit of water using a small paint brush or water brush.  (The amount of water you will use depends on the intensity of the color desired).  I used this method on Alexandra, the Hot Air Ship, Paris Air and the Paris enameled plate.  Cut all images out, including the car.

I punched two holes for the brads on either side of the enameled plate and then spread Ranger's Glossy Accents over the top, being careful not to put it over the holes and not too thick.  Let dry. 

Finally, I arranged all of the images on top of the Mother Nature paper and adhered them.  I started by laying the Hot Air Ship flat and then I added pop dots to the back of the remaining images and placed them all around the Ship.  Two holes were punched into the enameled plate and brads inserted.  Two small holes were punched into the card and brads attached.  I created the mats to help frame the piece and stamped "Thanks for the Lift" on the inside of the card.

I hope you enjoyed my card creation for this first blog entry.  I am a bit challenged by technology, however, I am learning slowly but surely and hope to eventually include tutorials.  Thanks to all for following along with me on my creative journey!

Susan