Friday, May 13, 2016

3 W'S - WOOD, WORD AND SOMETHING WILD ART ADVENTURE

Welcome everyone!  This month Cheryl has given us a wonderful prompt for our art adventure!  Ah, what to create with wood, a word and something wild...

This one turned out to be surprisingly easy for me!  I have always wanted to do something with my favorite photo of my children when they were 5 and 7.  We had just moved here to Colorado and were excited about spending lots of time in Rocky Mountain National Park.  This was one of the first photos we took.  It was just waiting to be placed on a canvas:

I began by making a copy of this photo at the copy store.  I then transferred it onto Sticky Back Canvas.  You need a little patience with this technique when you use a larger photo, but it was so worth it!  It gives a bit of a "rustic" look to the photo.


 This piece was set aside while I worked on the main canvas.

The "wood" part of this piece is a Crafters Workshop woodgrain stencil that I used.  I applied gesso to the canvas via the stencil, moving the stencil around until I had the canvas covered, everywhere but where the photo canvas would be.


I used a baby wipe and DecoArt Transparent Yellow Iron Oxide Fluid Acrylic paint to color the canvas.  I then added a coat of DecoArt Burnt Umber Fluid Acrylic paint over the top.  I was pretty happy with the resulting color!


Now to add the embellishments to the canvas.  Of course we have to have trees since we live near the mountains.  I used Tim Holtz's Thinlits Woodlands die to cut out three trees.  You will notice that this tree die actually removes the inside of the tree.  I kept the inside parts and pieced them back together as I wanted a more solid tree.


I adhered the three trees to the left side of the canvas, knowing that the photo canvas would slightly cover part of the trees.  I then adhered the photo canvas to the larger canvas.


Now to add a word and some wildflowers.  The wildflowers are a lavender stamp by Impression Obsession.  I stamped it onto tissue paper using Wendy Vecchi's Fern archival ink.  I then carefully cut around the image and adhered it to the right side of the canvas using matte medium.  When dry, I cut apart some flowers from a stem I bought at a hobby store and placed the tiny purple blossoms over the lavender flower part of the stamped image.


I also added some white blossoms for variety.


To finish the piece I wrapped some gingham ribbon from Creative Impressions around the canvas, going along the base of the photo and adhering a word band from Idea-ology to the left side under the photo.  I adhered a few more blossoms over the ribbon on the right side.  The word seems to fit this scene perfectly as if says "Always be on the Lookout for Wonder".  My kids were constantly amazed by all the beautiful things they found in the park.

If you will notice, there is an elk happily grazing in the background of the photo.  She fits the "Wild" part of this adventure just as the Wildflowers do!  Now for another "wood" element, I placed a found branch along the top of the canvas photo.

I hope you like this piece and will have fun creating your own project using the 3 W's!  Happy Creating!

Susan


Tuesday, April 12, 2016

ALTERED CIGAR BOX - SPRING IS HERE!

Welcome to another new adventure at Creative Carte Blanche!  This month's adventure is hosted by my dear friend, Annette Green, who has challenged us to alter a cigar box into something for which you wouldn't normally use them.  Well, I guess that means no cigars will be stored in this box!

Here in Colorado, we dealt with a blizzard in March that dumped 20" of snow on us  - more than the previous winter storms this year.  Needless to say, I am ready for Spring.  Spring is officially here, but someone needs to tell Mother Nature that!  Of course, with Spring on my mind, I had to create a box with a Spring theme to enjoy!  Here is the outside of the box:

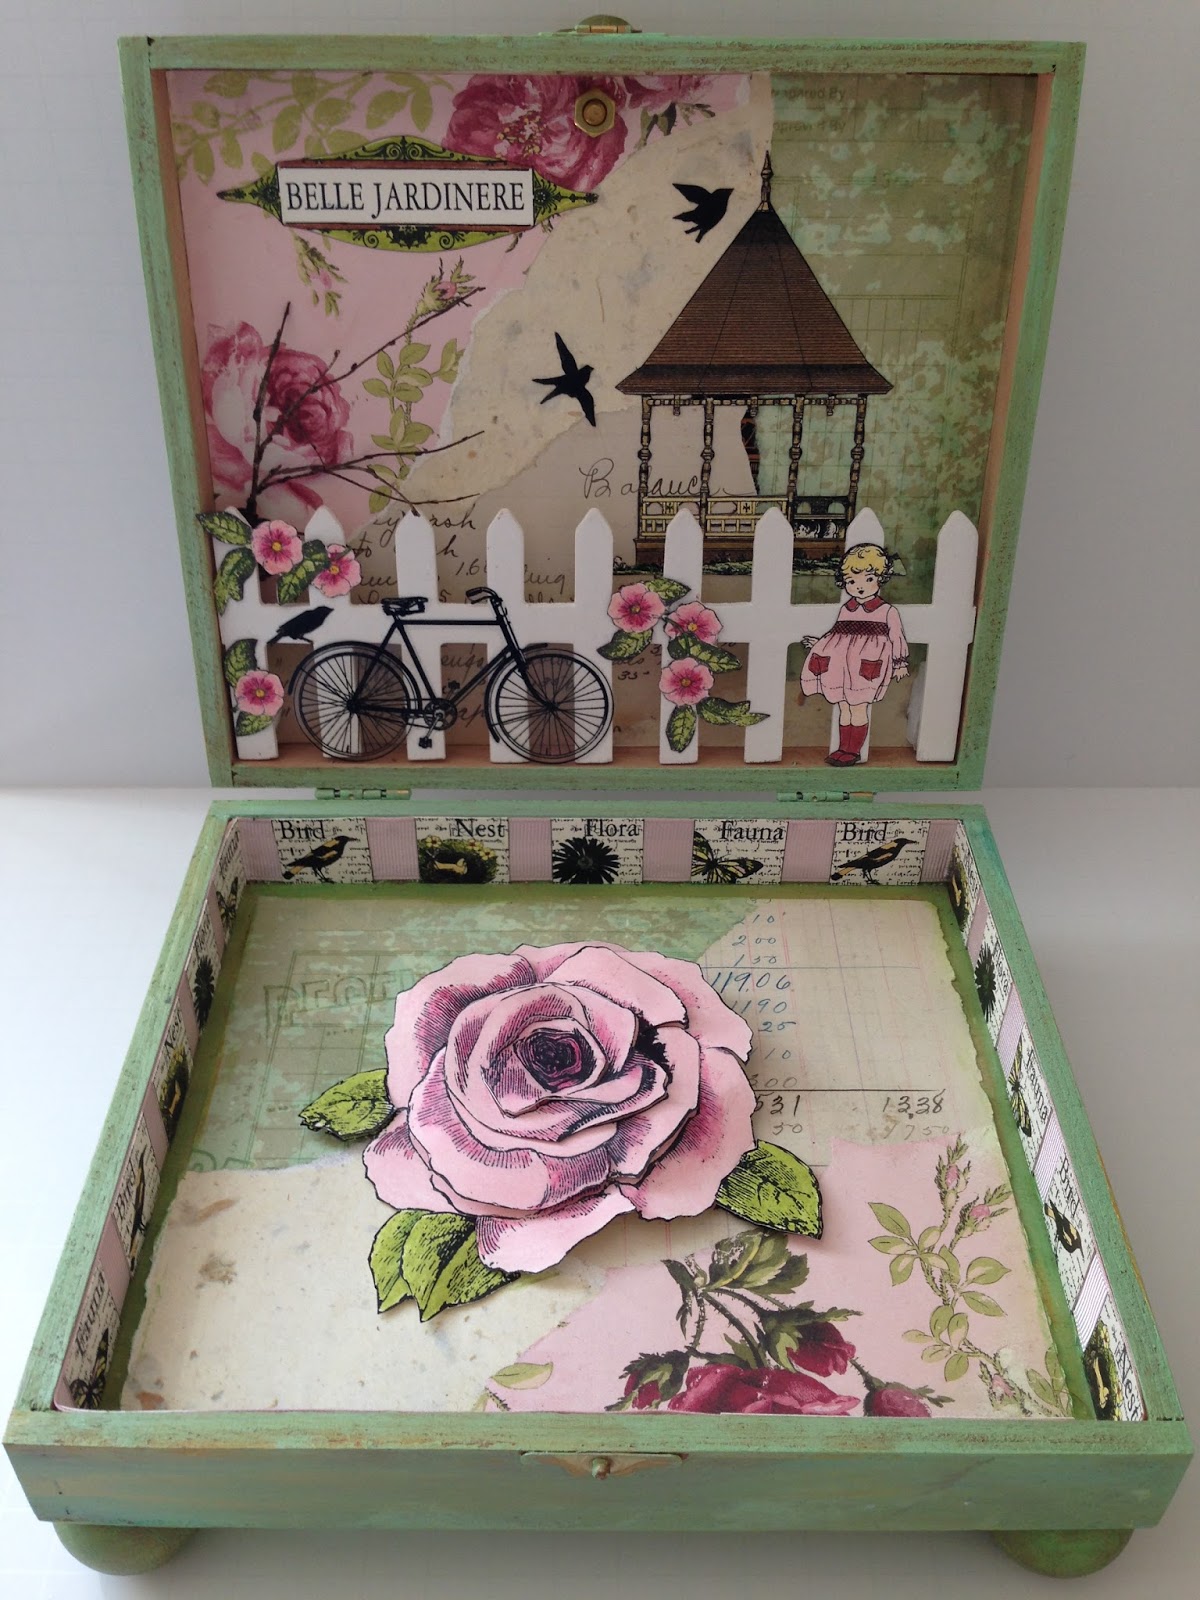
 And the inside:


I confess that I was very bad about getting photos taken of each process.  The camera never seems to be upstairs when I am working!  I started with a regular cigar box and painted it with a variety of Liquidtex Acrylic Paints, including these colors:


I mixed colors together and painted the entire cigar box.  I then lightly dry brushed some gold metallic paint over the top of the previous colors:


Now it was time to decorate the top.  Using matte Medium I collaged several different papers I had in my stash onto the painted box top and the insides of the box.  I cut out several images from various papers and adhered them to the collage.


I stamped several B Line Designs images onto acetate with Archival ink and let them dry overnight.  They were then adhered to the collaged papers.


For the inside, I decided to create a Spring scene using papers and B Line Designs stamps.


I collaged more papers and adhered them with matte medium as I did with the papers on the cigar box top.  The images of the little girl, the gazebo, the birds, the "Belle Jardiniere" sign and the flowers were all stamped in black on cream scrap card stock and fussy cut (oh, how I love to fussy cut - for real!)  I colored all with colored pencils, cut them out and adhered the sign, the gazebo and two birds over the collaged paper.

The lid had a bit of depth to it, so I painted and cut a wooden fence from the hobby store to fit inside the top of the cigar box.  The girl, the flowers, one bird and the bicycle were stamped again on acetate and were then all adhered to the fence.  Finally, with the addition of a small branch from my yard, the inside top of the box was finished.  Here are some close-ups:


Now for the inside bottom of the box.  It also had some depth to it, so I was able to add a dimensional large rose I created after the box was collaged:


I stamped the rose three times on scrap cardstock and layered it with foam tape to give it dimension.  Here is some of the detail:


I used a wide pink ribbon on the side edges of the box and adhered some small images from a B Line Designs cube to finish the inside bottom:


Hopefully this photo shows the ribbon and images around the entire inside edge.

Now to add the finishing touches.  I added a green knob purchased at the hobby store to the box top after drilling a small hole in the top:


I painted some partially round wooden knobs, using the same colors of the box and adhered them to the bottom of the box for feet:


I am pretty happy with the end result.  It will sit in my bedroom in an open position so that I can enjoy the Spring scenery!


Can't wait to see what all of you create!

Susan


Tuesday, March 15, 2016

CREATIVE CARTE BLANCHE - CORRUGATED PAPER, METAL AND LACE

Hello everyone!  I hope you have all been enjoying your creative adventures with Creative Carte Blanche!  I know all of us have truly enjoyed seeing your creations and are learning a lot at the same time!

Candy is hosting this current adventure and has come up with a wonderful challenge for us all - to use corrugated paper, metal and lace together in the same project.  I really enjoyed the idea of grouping these three items together and, something unusual for me, came up with an idea pretty quickly.

Those of you who followed us during our Compendium of Curiosities adventure may know that I love to use old photographs that I am fortunate enough to have from my family.  It has always been on my "bucket list" to create beautiful art with these photographs to enjoy and hopefully pass down in the family.  If you are like me, I have so many projects in my head and not enough time to do them all, so it is nice that I have this opportunity.  Here is my creation:


The photo is of my great grandparents' wedding.  I decided that I didn't want to add much color to this piece, so I used light colors that I found in the photo.

I started off by using white gesso to prepare the canvas.  Then I began laying different pieces I wanted to incorporate until I was happy with the look.  Originally I thought I would add a pop of color to the top right and bottom left of the canvas, however, I decided to remove the fussy cut paper flowers and stick with a softer look.


I then removed all of the elements and glued torn pieces of corrugated cardboard onto the canvas.


Next came the paint.  I used Tim Holtz Distress Paints - Antique Linen, Tattered Rose, Brushed Corduroy, Pumice Stone, Vintage Photo and Picket Fence and applied them with a brush and a baby wipe.  I tried to closely match the colors found in the photo.


I used DecoArt's Media Matte Varnish to seal the canvas when the paint was dry.


I painted a torn heart I created with the same colors from the canvas and sealed it.  I then added a       Time Piece and a word band from Tim Holtz Idea-ology to the heart.


Then it was on to the lace.  I wanted to use quite a bit in order to create a soft, romantic feel.


It was now time to add some additional metal embellishments, a key and a Philosophy Tag               from Idea-ology.  I laid down some Prima flowers so that I could judge where to put the metal pieces.


They are hard to see, but the leaves are also metal leaves from Idea-ology.

Now to add the photo...I adhered the photo to some heavy black cardstock first to make it stronger and then adhered the photo to the canvas using foam tape and matte medium.


To complete the piece, I adhered the Prima flowers to the canvas as well as three antique buttons from Tim Holtz Idea-ology.  The torn heart was also adhered, partially covering the bottom of the photo.


I have to say that I am pleased with the way this canvas turned out!  I think my great grandparents would be happy!

Many thanks to Candy for coming up with this wonderful adventure for the month of March.  Hope you all will join along!  Don't forget to check out our blog and upload your photos here.

Happy crafting!
Susan


Friday, February 19, 2016

CREATIVE CARTE BLANCHE - MY FIRST POST!

Welcome to Creative Carte Blanche everyone!  I am so excited to be presenting my first post for this wonderful new adventure with some of my dearest friends - Linda Ledbetter, Candy Colwell, Annette Green, Cheryl Grigsby, Hels Sheridan and Yvonne Blair!

We had so much fun working together in the past that we decided it would be a terrific idea to create an artistic blog- a place where artists of all skill levels could meet and come together as an international community and share new artistic adventures!  Our group of "creative instigators" will lead you with a monthly "prompt".

This month's prompt is "Anything Goes!" However, we would like you to try a new technique that you haven't attempted before or use a product new to you to create your artistic piece.

Without further ado, here is the piece I created:


I used techniques that I have been wanting to try but was too nervous to actually do!  This month's prompt encouraged me to try it.  I started with a canvas that I prepped with DecoArt white gesso.  I was also determined to use paper scraps that I had been saving forever.  This is how it started out:


I attached all the paper scraps with DecoArt matte medium.  After I questioned my sanity in undertaking such a project, I gave myself a pep talk and kept going.

Unfortunately I didn't take a photo at this point, however, I decided I wanted a soft look to the piece, so I used Ranger's Picket Fence white paint and watered it down slightly on a craft mat.  I applied the paint over all the paper.  Then I placed an acrylic block behind the canvas so that I could easily stamp the Poppies Alone image by Yvonne Blair for Impression Obsession onto the canvas.   I cleaned the stamp and stamped the small flower again onto the canvas.  I then used a small paint brush and Bundled Sage Distress paint to add color to the leaves.

The two flowers from the stamp were stamped onto an extra piece of cream cardstock.  I cleaned the stamp and then re-stamped the small flower onto cream card stock.  I used Scattered Straw, Fossilized Amber and Wilted Violet Distress inks to color the flowers.


After cutting out the flowers, I decided that they were too bright in comparison to my canvas, so I applied a bit of Picket Fence Distress Paint over the top of the flower with my finger.  Better!

Using DecoArt matte medium, I affixed the cut out flowers to the flowers previously stamped onto the canvas.


To be completely honest, I didn't like this canvas at all!  However, I decided not to give up - it just 
needed something else, but what?

Ah, back to the paper scrap bin!  These paper strips were already scalloped!  


Now I needed some color added to the various pieces and, of course, some lovely butterflies from the small butterfly trio byYvonne Blair for Impression Obsession!  I laid everything down loosely to see if I liked the composition.


Okay, now for the addition of Wilted Violet Distress Ink to the different pieces - the color did the trick!

The butterflies also had a touch of Picket Fence paint applied to them with my finger to tone down the colors and were affixed to the canvas.  One more touched still needed...


The addition of a strip of orange-gold card stock behind the two scalloped paper strips made the piece  come together and pop!  I am happy!  What a process - goes to show you not to give up on an art piece!  

Hope you will feel brave and try something new as well!  You won't regret it!

Susan


Wednesday, December 23, 2015

Winter Cheer

Hello everyone!  I thought I would get a last post in before Christmas!

I'm sure everyone is getting beautiful Christmas cards this time of year, but have you ever thought about sending Winter cards after the holidays to celebrate (yes, I said "celebrate") Winter and it's beauty?  After all, the kids and adults can go sledding, the skiers are thrilled here in Colorado and elsewhere and, let's face it, the snow is beautiful.  For those that aren't so crazy about Winter, a card can cheer them up and let them know you are thinking about them.  So, without further ado, here are several cards created by me and my talented co-design team member with B-Line Designs, Michelle Bodensteiner.  The first one is a beautiful sledding card by Michelle.


Isn't this a gorgeous card?  I love the fact that it is not a traditional rectangular card.  The oval shape showcases the sledders (Winter Fun HO20E) and creates such a beautiful frame.  Michelle doubled the scalloped frame (My Mind's Eye - this could be easily die cut as well) using pop dots which gives the scene a 3 dimensional look.  Michelle stamped the sledders with markers using the Direct-to-Rubber technique and then added some color pencil to the children' shoes.

For added texture on the children' image, Michelle stamped part of the pine tree small (HO103D) so that it looks like the little girl is holding it.  Then the Bough Duo (HO149F) was stamped randomly around the edges of the scene with green and red markers.

I love all the little details Michelle used to create such a lovely scene!  Even the deer on the side of the card is a stamp.  It is from the Gift Tag cube (HO106F) and is stamped in brown.  Then she used a Wink-A-Stella pen to add sparkle to the deer!  To finish the card, she used two snowflakes from Jolee's and lots of lovely crystals placed in the scallops.  Even the deer has a crystal tail!

This beautiful piece would also make a fabulous Christmas tree ornament or a tie-on tag for gifts simply by adding a ribbon loop to the top.  So versatile!

I created another winter scene using Dream Catcher (HO145F):


The card is a combination pop-up/shaker card that is fun to make.  I stamped the Dream Catcher scene with Navy ink and colored her outfit with color pencils.  Using foam tape and acetate I created the shaker box within the pop up.

I used the snowflake Border (HO141E) for the sides of the card and navy blue ink.  I punched multiple white snowflakes for the top and bottom borders of the card.  To finish the inside of the card, I stamped the word "Believe" (HO116C) with black ink.

Here is the front of the card:


I used the Pine Tree Small (HO103D), stamping them twice.  I had previously made a (snow mask) with plain copy paper to give the scene a little dimension.  To finish I stamped Let it Snow (HO143C) with navy blue ink, went around the edges with blue ink and finally added some ultra fine glitter to the snow.

Hope you have enjoyed these winter cards.  For more information regarding the stamps that where used, please stop by www.blinedesigns.com.

I wish you all a very Merry Christmas and a happy New Year 2016.  Stay warm and enjoy Winter!

Susan

Friday, November 6, 2015

Yvonne Blair Designs Blog Hop

Hello Everyone!  Recently I was asked by Yvonne Blair of Yvonne Blair Designs to participate in a blog hop featuring her fabulous new products.  Of course I said "yes" as I have been enjoying creating with these new products!  My fellow designers and I are creating different projects using Yvonne's Inky Art Journal and her very own new Journal Buddy tool.  I also used some of Yvonne's stamps available through Impression Obsession.  Here is my project:


I was defintely looking to create a journal spread that made me happy each time I looked at it.   This spread definitely "fit the bill" for me as I smile every time I look at it.  It is so easy to do when Yvonne's lovely stamps have such positive messages!

Yvonne's Inky Art Journals come in three sizes - 4" x 6",  4" x 8" and 6" x 8".  I especially LOVE this 4" x 8" journal size as it is also the size of some manila tags.  Therefore, if I completely mess up the page, I can remove it and create a tag with it later.  The manila cardstock pages are so wonderful to work with - very easy to blend colors for backgrounds!

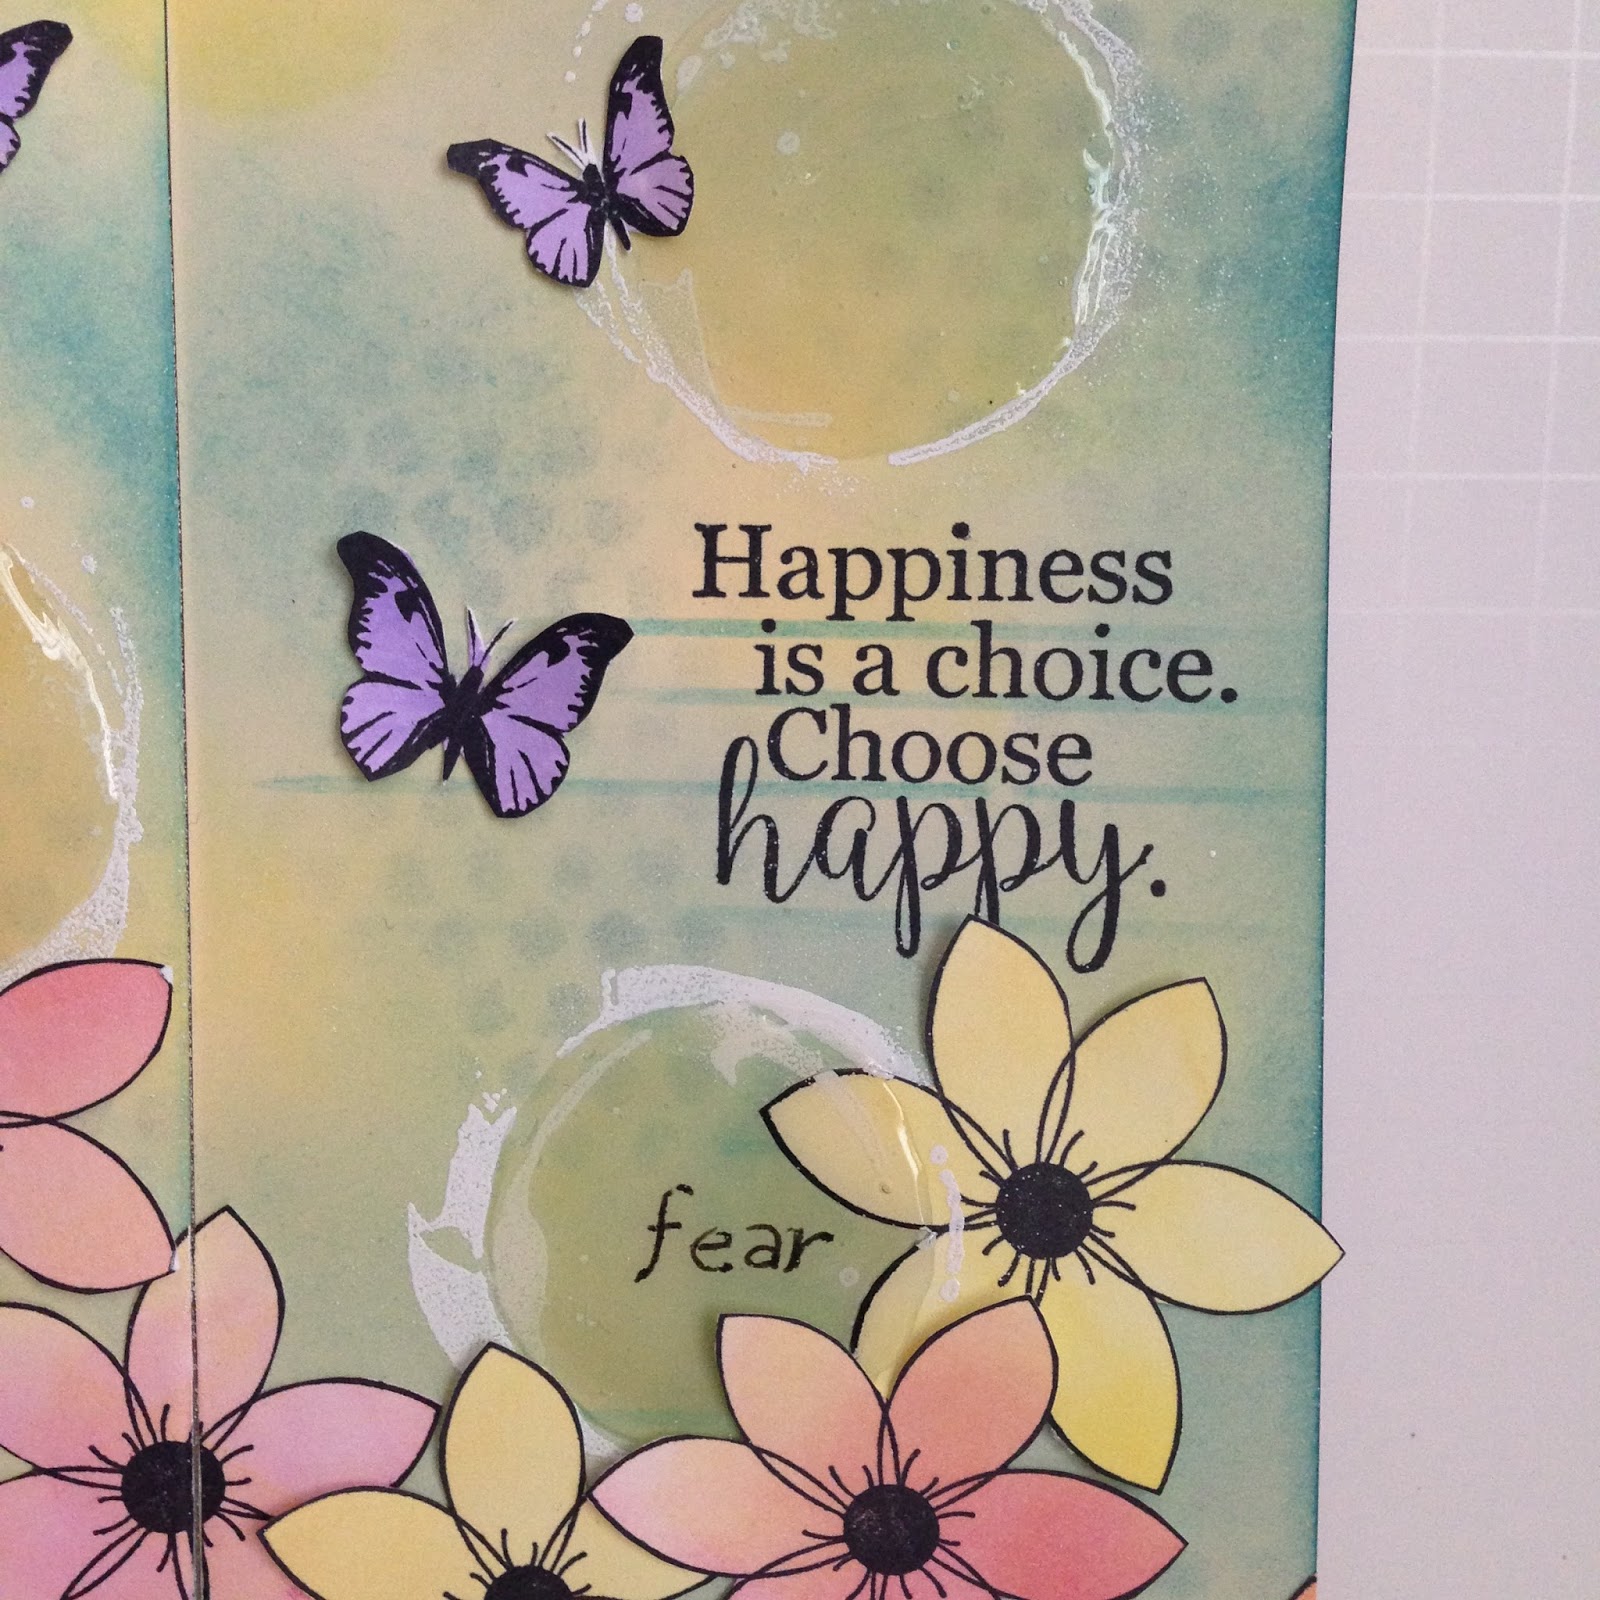
I blended Ranger Squeezed Lemonade and Broken China Distress Inks onto the two page journal spread to create the background base.  I then used Tim Holtz's Textured Impressions Bubble stencil and Broken China Distress Ink,  applying the ink randomly to the background.  Yvonne's Impression Obsession stamps - "Blow Your Worries Away" and "Choose Happy" were stamped onto the pages in Archival Black ink.  I also used Yvonne's Journal Buddy and Peacock Feathers Distress Ink to add stenciled "underlines" to the sentiments and to add some added interest to the pages.  Love this look!


As you can see in the above photos, I used Yvonne's "Grunge Circles" stamp to create "bubbles" on the pages.  I stamped my "bubbles" with clear pigment ink and followed up with white embossing powder.  Then I added Ranger's Glossy Accents to the inside of two bubbles to finish the look.   I think they really look like real bubbles!   I wrote the words "fear" and "failure" using a Ranger Fudeball black pen to represent some of the "worries" that need to be blown away!

I stamped the "Single Daisy" 8 times and the "Sm Butterfly Trio"twice onto scrap cardstock, blending Picked Raspberry and Lemonade Distress inks onto the flowers and watercoloring  the butterflies using the new Wilted Violet Distress Ink.  Finally, I cut all the pieces out and set them aside.

I wanted some of the flowers to be in front of the bubbles and others to be behind, so I began by laying out three flowers on the pages and adhering them.  I then re-inked the "Grunge Circles"                stamp and carefully lined up the stamp to the original stamping so that just the outside edge was inked over some of the flower petals.  I then white embossed them so it looks like the bubble is in front of the flowers and followed up with Glossy Accents applied to the inside of the "bubble".


Once the Glossy Accents was dry, I adhered the rest of the Daisies to the pages along with five butterflies.


I hope you have enjoyed my journal pages.  To see more ideas using the Inky Art Journal and the Journal buddy, please visit these other talented ladies' blogs:

Cheryl Boglioli www.cherylboglioli.com/blog
Linda Ledbetter www.lindaledbetter.com
Yvonne Blair www.yvonneblair.com

I can't wait to see what they have created with Yvonne's products!

Now here's the best part!  If you leave a comment on each of our blogs, Yvonne will put all your names in a bowl and draw a winner!  The lucky winner will receive a 4" x 8" Inky Art journal.


Giveaway 1.jpg
Giveaway 1.jpg
If you would like to order Yvonne's journal or the Journal Buddy Tool,  please contact Yvonne at www.yblair1@gmail.com.  She will be happy to help you out!  Her stamps are available through Impression Obsession at 
http://www.iostamps.com/mm5/merchant.mvc?Screen=CTGY&Store_Code=IOSTAMPS&Category_Code=YB
Susan