Friday, July 15, 2016

JULY CHALLENGE - CREATIVE CARTE BLANCHE - BOOKPAGES AND BLOOMS

Time is sure flying this Summer!  Can't believe we are already in the month of July!  The lovely Hels Sheridan has challenged us to a wonderful adventure - Book Pages and Blooms.  I wanted to incorporate Summer into this challenge, so here is what I came up with:


My piece - a 5 x 7" canvas - also includes one of my favorite authors, Jane Austen.  My favorite book and movie is Pride and Prejudice.  I used a wonderful stamp from B Line Designs entitled "Miranda" to represent Jane Austen.  I had to stamp her on paper first and enlarged her onto card stock so that she would be better proportioned in the scene I created.

I also stamped B Line Designs book and inkwell onto scrap card stock, colored and cut them both out.  I adhered some book text from the book Pride and Prejudice to the book and then glued the ink well over the text.


Now to finish the book.  I added the words "Jane Austen" to the letter below the book.  Then I adhered an embellishment I found in the bead department at my local craft store appropriately called "Pemberly" to the center of the book.


I prepared an art canvas by covering it with white gesso and letting it dry.  Then I used Broken China Distress Paint and a baby wipe to add blue color to the canvas, dabbing the color on.  Once dry, I used a stiff brush and white gesso to dab on "clouds".


I also added some Peeled Paint Distress Paint to the bottom of the canvas and at the base of the fence.
I stamped B Line Designs Manor fence twice onto tissue paper and adhered the image,- overlapping the two gates to create a wider one - using matte medium.


Now to add the pre stamped, cut and colored images to the canvas.


 I die cut a Grand Alder tree from memory Box using cream card stock and coloreds the tree with pencils and marker.  I cut the right edge away from the rest of the tree and added it to the right edge, over the fence.  My Jane Austen was then adhered over this piece.

The book was adhered to the left of my lady's image.  I stamped two swallows (B Line Designs Flying Friends Cube) onto scrap card stock, colored, cut out and adhered them to the left top of the canvas.

To finish, I added a piece of lace to the bottom of the canvas and then adhered a Beaded Strip                     border from B Line along the top of the lace.

I used Tim Holtz's Tiny Tattered Florals die to cut out some roses from a page from the Jane Austen book.  I spritzed some Spiced Marmalade Spray Stain onto a craft sheet along with water to tone down the color a bit.  The same was done with Peeled Paint Distress Spray Stain to color the leaves.  Once dry, I rolled the roses and placed the roses and leaves on either side of the canvas bottom.

Once again the finished canvas:


This was definitely a fun art adventure!  I can't wait to see what all of you create!

Susan


SaveSave

Tuesday, June 28, 2016

JUNE CREATIVE CARTE BLANCHE ADVENTURE - WINGED THINGS

Hello everyone!  Welcome to my post for the June Winged Things creative adventure!  I hope you have been enjoying the projects posted by my wonderful cohorts here at Creative Carte Blanche along with all of yours shared here during this month.

I chose this theme as the I love "Winged Things" and the possibilities are endless.  Besides that, I had so many ideas going through my head!  I actually created two projects this month, very similar, using two different "winged" themes - I knew I had to get them out of my head and into a project, so here goes:

Here is the first and main project:


I have to admit, I LOVE to create with Altoid tins!  It's a good thing as my brother-in-law is addicted to them and goes through one tin a week.  Every time we visit them I come home with a huge bag of tins!

I had been saving this quote by Ralph Waldo Emerson from an older G45 paper for some time as I knew the right project would present itself!  This was it!  I began by preparing the tin (I used just the bottom of the tin and removed the lid) by adding some mushroom alcohol ink with a blending tool along the edges.  I then adhered the quote inside, allowing it to bend inside the tin to give it some depth.  Then I used a strip of adhesive backed burlap from Tim Holtz's Textured Surfaces                            and adhered it around the outside edges.  This is great stuff!


I set this aside and cut a piece of my favorite Wallflower paper to fit within a Tim Holtz burlap panel, tearing around the edges and adding Vintage Photo Distress Ink to give it more of a distressed look.  I then adhered it to the panel.  I laid the tin in the center of the burlap panel so that I could determine the correct placement for the other embellishments.


Now to decorate the piece. I mixed some Peeled Paint Distress Ink with some modeling paste and used Tim Holtz Stampers Anonymous Traveler stencil to add the word "Explore" at the top of the piece.


I used a thin die - Savannah Border by Memory Box - and cut out two border pieces from green card stock which were then adhered to each side of the tin over the top of the Wallflower paper.

I stamped B Line Designs' Large Butterfly onto a piece of scrap card stock that had been previously colored with Distress Paints and cut the image out.  This piece was then glued to the very bottom of the tin.  (Note:  If you look closely, you will see that the butterfly's antennae were cut off and a small piece of stiff linen thread was knotted at both ends, folded in half and adhered to the butterfly.  This was a great idea that my creative cohort, Cheryl Grigsby, showed me several years ago.  Isn't it great!)  Don't know it you can see it very well in this photo.


I also painted one of the Adornments Nature metal charms by Tim Holtz with Distress inks and glued it to the top of the tin.


To finish the piece, I added some roses and leaves I created from Tim's Sizzix Alterations Tiny Tattered Florals die and several dragonfly brads by Creative Impressions.  Here are a few more photos of the finished project:


Hope you like it!  Now for the second project - It is made in the same way as the first one, except that I covered the inside of the tin with papers and used more stamped images by B Line Designs that create more of a scene inside the tin:


I used paper from Graphic 45's Once Upon a Springtime collection for the back and the outside of the tin and a handmade green paper strip for the inside.


B Line Design images were stamped, colored with colored pencils and cut out.


I began gluing the images to the inside to create a scene:


I used a piece of Graphic 45 Once Upon a Springtime paper torn around the edges as with the first project and glued it to the burlap panel.  Then I used more modeling paste mixed with Peeled Paint Distress ink to make the grass at the bottom with Wendy Vecchi's Studio 490 From The Garden            stencil.


I die cut a bamboo shoot from from green card stock using Memory Box's die of the same name and adhered it to the right side of the panel.  A few small flowers from the Memory Box Flower Mound die were cut and hummingbird and dragonfly stamped images were colored and cut out from scrap card stock and adhered to the panel to finish the scene.


I think I am addicted to making these pieces!  I have even more ideas!

Thanks again for joining us for this month's adventure.  All of us at Creative Carte Blanche hope that you have enjoyed our projects.  Hels Sheridan will be posting all of the information for our July adventure, so stay tuned!
Susan

Friday, May 13, 2016

3 W'S - WOOD, WORD AND SOMETHING WILD ART ADVENTURE

Welcome everyone!  This month Cheryl has given us a wonderful prompt for our art adventure!  Ah, what to create with wood, a word and something wild...

This one turned out to be surprisingly easy for me!  I have always wanted to do something with my favorite photo of my children when they were 5 and 7.  We had just moved here to Colorado and were excited about spending lots of time in Rocky Mountain National Park.  This was one of the first photos we took.  It was just waiting to be placed on a canvas:

I began by making a copy of this photo at the copy store.  I then transferred it onto Sticky Back Canvas.  You need a little patience with this technique when you use a larger photo, but it was so worth it!  It gives a bit of a "rustic" look to the photo.


 This piece was set aside while I worked on the main canvas.

The "wood" part of this piece is a Crafters Workshop woodgrain stencil that I used.  I applied gesso to the canvas via the stencil, moving the stencil around until I had the canvas covered, everywhere but where the photo canvas would be.


I used a baby wipe and DecoArt Transparent Yellow Iron Oxide Fluid Acrylic paint to color the canvas.  I then added a coat of DecoArt Burnt Umber Fluid Acrylic paint over the top.  I was pretty happy with the resulting color!


Now to add the embellishments to the canvas.  Of course we have to have trees since we live near the mountains.  I used Tim Holtz's Thinlits Woodlands die to cut out three trees.  You will notice that this tree die actually removes the inside of the tree.  I kept the inside parts and pieced them back together as I wanted a more solid tree.


I adhered the three trees to the left side of the canvas, knowing that the photo canvas would slightly cover part of the trees.  I then adhered the photo canvas to the larger canvas.


Now to add a word and some wildflowers.  The wildflowers are a lavender stamp by Impression Obsession.  I stamped it onto tissue paper using Wendy Vecchi's Fern archival ink.  I then carefully cut around the image and adhered it to the right side of the canvas using matte medium.  When dry, I cut apart some flowers from a stem I bought at a hobby store and placed the tiny purple blossoms over the lavender flower part of the stamped image.


I also added some white blossoms for variety.


To finish the piece I wrapped some gingham ribbon from Creative Impressions around the canvas, going along the base of the photo and adhering a word band from Idea-ology to the left side under the photo.  I adhered a few more blossoms over the ribbon on the right side.  The word seems to fit this scene perfectly as if says "Always be on the Lookout for Wonder".  My kids were constantly amazed by all the beautiful things they found in the park.

If you will notice, there is an elk happily grazing in the background of the photo.  She fits the "Wild" part of this adventure just as the Wildflowers do!  Now for another "wood" element, I placed a found branch along the top of the canvas photo.

I hope you like this piece and will have fun creating your own project using the 3 W's!  Happy Creating!

Susan


Tuesday, April 12, 2016

ALTERED CIGAR BOX - SPRING IS HERE!

Welcome to another new adventure at Creative Carte Blanche!  This month's adventure is hosted by my dear friend, Annette Green, who has challenged us to alter a cigar box into something for which you wouldn't normally use them.  Well, I guess that means no cigars will be stored in this box!

Here in Colorado, we dealt with a blizzard in March that dumped 20" of snow on us  - more than the previous winter storms this year.  Needless to say, I am ready for Spring.  Spring is officially here, but someone needs to tell Mother Nature that!  Of course, with Spring on my mind, I had to create a box with a Spring theme to enjoy!  Here is the outside of the box:

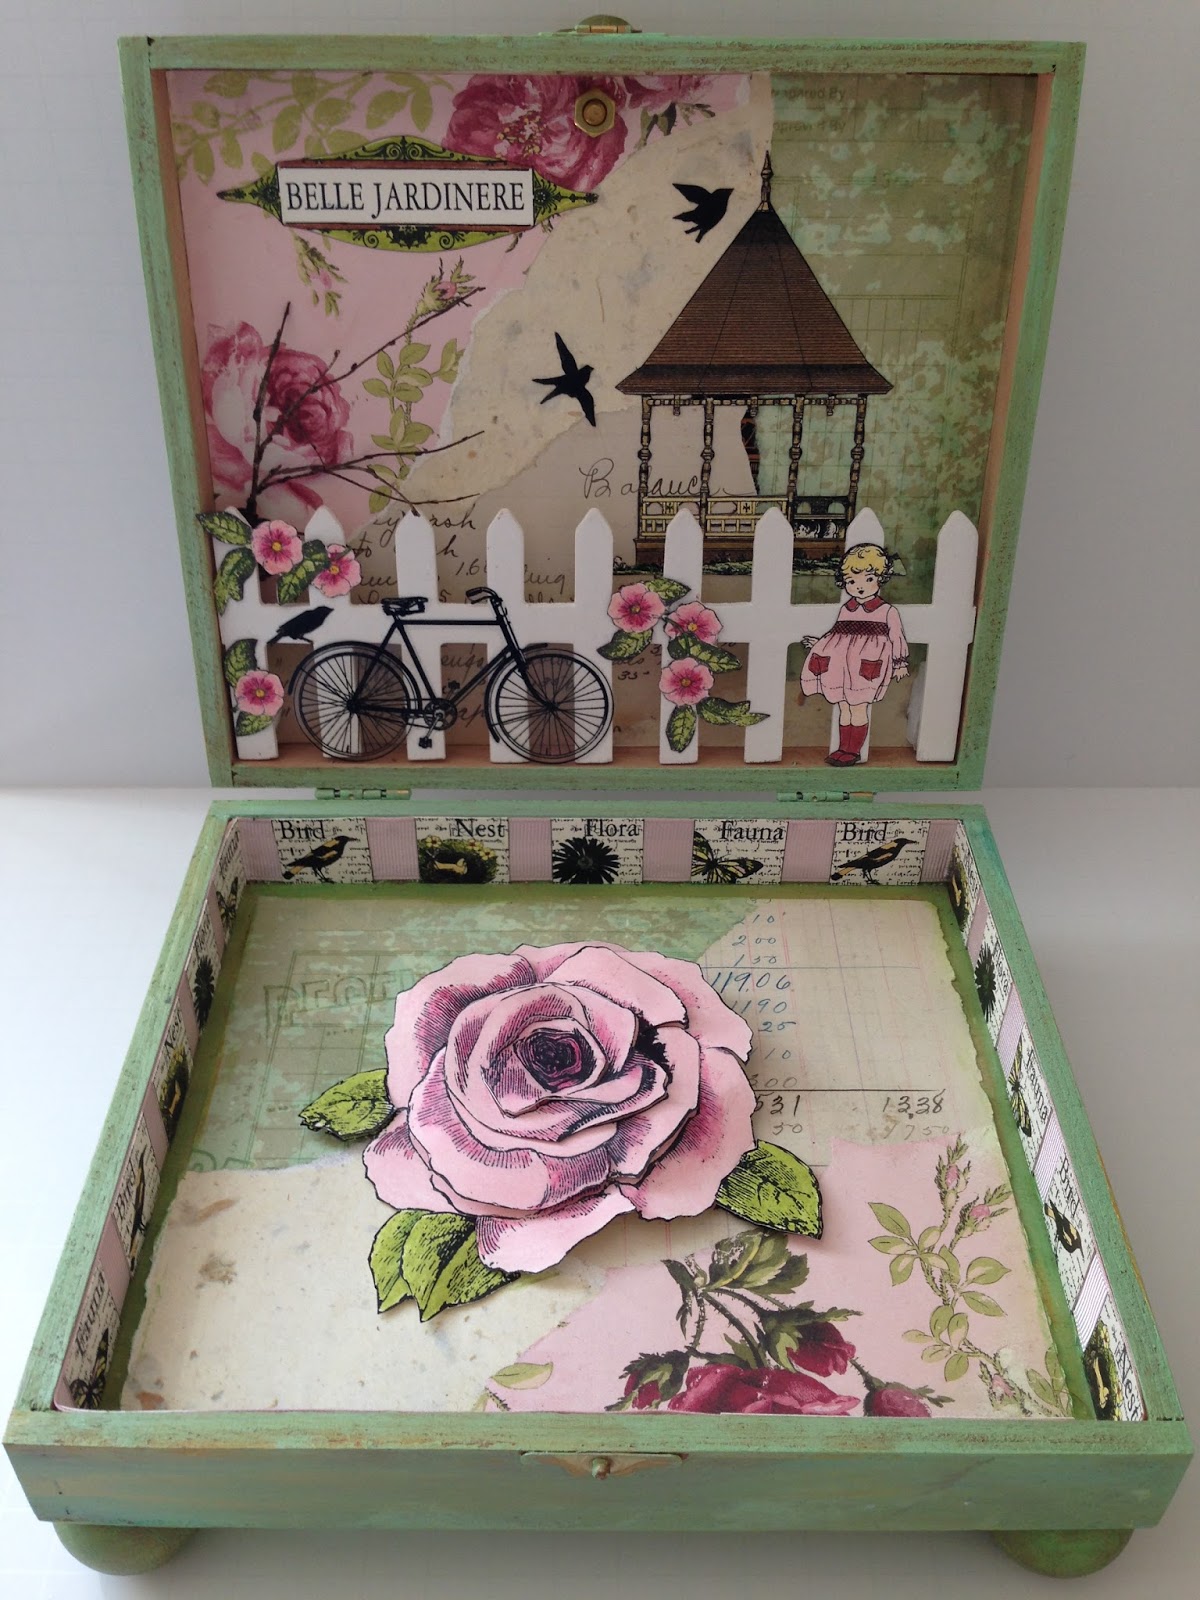
 And the inside:


I confess that I was very bad about getting photos taken of each process.  The camera never seems to be upstairs when I am working!  I started with a regular cigar box and painted it with a variety of Liquidtex Acrylic Paints, including these colors:


I mixed colors together and painted the entire cigar box.  I then lightly dry brushed some gold metallic paint over the top of the previous colors:


Now it was time to decorate the top.  Using matte Medium I collaged several different papers I had in my stash onto the painted box top and the insides of the box.  I cut out several images from various papers and adhered them to the collage.


I stamped several B Line Designs images onto acetate with Archival ink and let them dry overnight.  They were then adhered to the collaged papers.


For the inside, I decided to create a Spring scene using papers and B Line Designs stamps.


I collaged more papers and adhered them with matte medium as I did with the papers on the cigar box top.  The images of the little girl, the gazebo, the birds, the "Belle Jardiniere" sign and the flowers were all stamped in black on cream scrap card stock and fussy cut (oh, how I love to fussy cut - for real!)  I colored all with colored pencils, cut them out and adhered the sign, the gazebo and two birds over the collaged paper.

The lid had a bit of depth to it, so I painted and cut a wooden fence from the hobby store to fit inside the top of the cigar box.  The girl, the flowers, one bird and the bicycle were stamped again on acetate and were then all adhered to the fence.  Finally, with the addition of a small branch from my yard, the inside top of the box was finished.  Here are some close-ups:


Now for the inside bottom of the box.  It also had some depth to it, so I was able to add a dimensional large rose I created after the box was collaged:


I stamped the rose three times on scrap cardstock and layered it with foam tape to give it dimension.  Here is some of the detail:


I used a wide pink ribbon on the side edges of the box and adhered some small images from a B Line Designs cube to finish the inside bottom:


Hopefully this photo shows the ribbon and images around the entire inside edge.

Now to add the finishing touches.  I added a green knob purchased at the hobby store to the box top after drilling a small hole in the top:


I painted some partially round wooden knobs, using the same colors of the box and adhered them to the bottom of the box for feet:


I am pretty happy with the end result.  It will sit in my bedroom in an open position so that I can enjoy the Spring scenery!


Can't wait to see what all of you create!

Susan