Showing posts with label Creative Carte Blanche. Show all posts

Friday, March 10, 2017

March Creative Adventure - Numbers

Welcome everyone!  This month's theme for Creative Carte Blanche is "Numbers".  I have to admit I thought long and hard about this one!  However, after a while I began to think outside the box and wondered what we could do in a day to make a difference.  I finally came up with this canvas:


Now I am going to be brutally honest with everyone this month and confess that I struggled with this piece.  I initially wanted to use a quote from Ghandi "There is more to life than increasing it's speed".  You will see in a few of these photos that I cut the words up and used them on the piece.  However, as I went along, I was not happy as the piece began to look too busy.  Off went the words as I tried to "clean up" this piece and simplify it a bit.  I'm sure everyone has had this happen to them at some point, right?

I began by covering a 5" x 7" canvas with Gesso.  When dry. I used Tim Holtz's Dot Fade Layering Stencil to add some texture using Wendy Vecchi's Studio 490 White Embossing Paste.   Once dry, I used DecoArt's Cobalt Turquoise Hue paint to cover the canvas.  I used a brush and a baby wipe to cover the canvas, using the baby wipe to highlight the textured areas.


Later on in the process I added some DecoArt Burnt Umber paint lightly over the top of the texture as well.

I wanted to convey the message that the Earth keeps turning and time marches on whether we want it to or not, so I used Tim Holtz Sizzix thinlit Globe to die cut the earth from a piece of Manila card stock.  Then I used Tim's Sizzix Large Pocket Watch and die cut this piece from some alcohol ink paper I had.

The Earth needed some texture, so I used Wendy's White Embossing Paste again to slowly "dab" the texture onto the land masses with a small paintbrush:


Next I used some DecArt Transparent Yellow Iron Oxide paint with a small paintbrush to add color to the newly textured land masses.  To tone down the color and add more terrestrial colors, I dry brushed on some Burnt Umber and later some Sap Green paint.  Candy Colwell used a similar technique in one of her tutorials.  Thanks for the great tips, Candy!

When the entire piece was finished, I trimmed it down so that it would fit inside the large pocket watch.


The next step was to adhere the pocket watch to the canvas along with a few other pieces:


I added the "clock hands" (Idea-ology game spinners)  to my pocket watch "world" .  I then cut out the "2" and the "4" from the numbers on Tim's Sizzix Alterations Word Play alphabet from black card stock and went around the edges of the numbers with Transparent Yellow Iron Oxide                     DecoArt paint.  I also began to lay down different elements.  This is where I told you that I wasn't happy with the words, so things changed a bit at this stage.


I took off the words and added more metal embellishments to represent time.  I used several Idea-ology large gears to which I adhered Time Pieces and spinners.  I used a Remnant Rub about time on one of the gears.


I also found some ticket stubs in my stash that I used to represent" your ticket to today".  I liked the extra pop of color they added to the canvas as well.

I used an Antique Copper metal frame from Creative Impressions to highlight another remnant rub with the abbreviation for "Number" that I added to one of the tickets at the bottom of the canvas.  I also used some Creative Impressions ball chain to add to the top of the pocket watch.

I deided to add another number "24" to the bottom of the canvas as well.


To finish the piece, I added a few more tiny gears to the canvas.  A friend of mine suggested I computer generate the abbreviations for hours, punch it out and attach to the gears.  Wasn't that a great idea?

Now I am happy with this canvas.  When I look at it, hopefully it will remind me to slow down a bit and appreciate every minute of the day as we never know what tomorrow will bring!  How will you spend your next 24 hours?

Susan

Tuesday, February 14, 2017

February Art Adventure - Love!

Happy Valentine's Day, Everyone!  I am the lucky Creative Cohort this month who gets to post on Valentine's Day!  Hope it's a good day for everyone!  To celebrate the day and our theme for this month, I have created a small canvas.


Don't you just love this photo?  I think it is the sweetest thing ever!

I began this project by painting the canvas using DecoArt Gesso to prepare the canvas.  When dry, I used DecoArts paints in Primary Magenta, Titanium White and Paynes Grey, mixing them as I went along.  I knew that I didn't want to alter the photo with color, so I decided to keep the whole piece in white, pink, grey and black.


I then added Creative Impressions grey web ribbon to the left side of the canvas, using matte medium to adhere it to the canvas.  While the matte medium was drying, I stamped a lovely border by Stampendous onto white tissue with black ink, cut it out and adhered it to the top and bottom of the canvas using matte medium.


Next I added the photo.


After adhering the photo to the canvas using matte medium, I also when over the top of the photo with the medium to seal it.

Now to add some color to the piece.  I began by laying down this cute Creative Impressions polka dot ribbon and adding a thinner piece of braid ribbon over the top.  I then made a bow and adhered it to the top left corner.  I also attached little white pearls to several places on the decorative border.


It still needs something at this point.  As you can see, I started adding some sweet little white butterfly brads to the photo.

I found a Tim Holtz Idea-ology Word Band that was perfect, "Capture Life's Moments".  I threaded some Creative Impressions braid ribbon through the band and adhered it to the piece.


To finish the canvas, I cut off the prongs of some darling heart brads and adhered them over the tops of some mini white spiral clips to bring a touch of white back to the ribbon.    It really finished off the project nicely.


I love this project not only because of the photo's subject matter, but also because it was not difficult to put together.  Sometimes I get carried away and work too hard on a project when all it really needed was simplicity to highlight a special photo.

Hope you are all working on your "Love" creations for this month!  Can't wait to see them!

Susan

Tuesday, January 10, 2017

JANUARY ART ADVENTURE - "BABY IT'S COLD OUTSIDE!"

Happy Winter everyone!  I know that a lot of you are not happy with this cold snap we have had along with the snow here in the U.S.  How has the weather been in the U.K.?  I was one of those moaning about it recently, however, I decided to turn things around and think of some positive aspects of Winter and especially snow.  One of my very favorite things to do when I was young was to go outside and catch snowflakes.  So, in honor of this winter fun, here is my project:


I decided to create a fat tag using one of my all time favorite B Line Designs stamps,  Dream Catcher.                          The stamp has a background, however, I  decided to cut her away from the background after coloring her with Prisma Color pencils and paint my own sky instead.


I incorporated one of my favorite techniques,  Paint Marbling.  If you don't know how to do this technique, you can find it on Page 43 of Tim Holtz's Compendium of Curiosities Volume III book.

I used four colors of Distress Paint,  Blueprint Sketch, Stormy Sky, Weathered Wood and Picket Fence and added a bit of each color to a craft sheet.  Then I spritzed the whole thing with water and ran my tag through the paint, swirling it as I went.  I dried it with a heat tool and then ran it through the paint again.  Love the way this turned out!


Since I'm from Colorado, I wanted to add some evergreen trees to the background behind my girl.  I used a Thinlits evergreen border die by Tim Holtz Alterations for Sizzix.  I die cut the border twice, once in a dark green and the second one in a lighter green.  Then I adhered the two together, slightly off-setting them to add dimension.


Next I added some gesso to the edges of the trees to look like snow.


Of course I needed a mound of snow for the little girl to stand on.  I took a scrap of white card stock and cut it in a curved fashion, then cut the edges to fit the tag.  I adhered my snow mound to the tag using foam tape.


I stamped just the snow mound from the Dream Catcher stamp, cut it out and adhered it to my larger snow mound cut from scrap card stock.  Foam tape was adhered to the upper part of the girl for dimension. I left the lower part of her legs free and used matte medium to adhere her boots and pantaloons to the snow mound.


At this point she needs some snowflakes to catch.  I die cut some small snowflakes from Cheery Lynn's Snowflake die  using white glitter card stock.  I then adhered the snowflakes randomly onto the tag.  At the same time, I created a loop and bow using one of my favorite ribbons from Creative Impressions, the white glitter ribbon.


I used gesso to add some snow texture around the edges of both of my snow mounds and sprinkled some Clear Rock Candy Distress Glitter over the top while it was still wet.  To finish the piece,  I added a slightly larger snowflake to the snow mound for interest as well as a purple felt Snowflake from Creative Impressions and a die cut snowflake over the top.  Here is a close up of the finished piece.


 And once again here is the entire piece.  Note that I created a black card stock mat for the back of the tag.


I hope you have enjoyed my Winter tag and that it inspires you to go out and catch a few snowflakes of your own!

We are all enjoying your projects for "Baby, It's Cold Outside!" here at Creative Carte Blanche!  Hope to see lots more!

Susan

Friday, December 9, 2016

DECEMBER CREATIVE CARTE BLANCHE - SONG LYRICS

I know, I know, I say this all the time as the months fly by, but I still can't believe the month of December has arrived!  It seems to have snuck up on me this again, but now I am getting into the Christmas spirit!  The lovely Cheryl has challenged us to create an art piece using song lyrics.  I decided to use Christmas song lyrics to create my project.  This journal spread is based one of my favorite Christmas songs "Colorado Snow" by the Nitty Gritty Dirt Band.  You can listen to the song here.


This was a bit of a scary project for me as I have never attempted a project such as this one in the past.  I decided to give it a whirl and I am pretty happy with the results.

I began by using two recycled pages from an old desk top calendar  I had from several years ago.  I just knew I wanted to recycle those pretty pictures!  The biggest challenge was how to unify two different pictures!


Sorry about the paper in the background!  That's what I get for working on two projects at a time!

Anyway, I pulled out my DecoArt fluid acrylic paints and got to work.  As  you can see above, I started with unifying the sky.  (Forgot to take a picture of them beforehand).  I used a mix of Primary Cyan, Titanium and Paynes Grey to create a bit of an overcast sky.  The sky is usually bright blue here, even in the Winter!

Once the sky was finished I had to unify the mountains in the background.  I turned to Phthalo Green-Yellow, Paynes Grey  and Primary Cyan for the Mountain.  I mixed them and went to work by using a small paintbrush and lightly dabbing the color over the mountains (the fog too).  Here is the result.


I then added some trees from a third photo to try to unify the bottom portion of the spread.
Now it was starting to come together!

I knew I wanted a Christmas scene at the bottom of the spread, so I turned to one of my all time favorite stamps by Embossing Arts - Cowboy Bringing Home the Christmas Tree.  I stamped the image using Range Archival ink in Library Green on scrap card stock.  Then I stamped some trees by Creative Impressions and Stampa Rosa, also in Library Green.  I colored the cowboy image using watered down Denim Blue and Gathered Twigs Distress Inks and a few markers by Tomboy.  I carefully cut around the tops of all the images and adhered them to the journal spread.


Now for the song lyrics.  I chose to use some of the words from the chorus "The closest thing to Heaven on this planet anywhere, is a quiet Christmas morning in the Colorado snow.".  The whole chorus includes the name of my home too, Boulder.  "All along the Rockies you can feel it in the air...From Telluride to Boulder down below....The closest thing to Heaven on this planet anywhere is a quiet Christmas morning in the Colorado snow."


Now I just needed a few snowflakes to finish of the scene.  I used a snowflake die from Cheery Lynn.


Now I have a journal page I can look at to remind me in the Summer (which I love too) why I can handle the cold here in Winter!  It is beautiful!

I know you all are busy this time of year, but we would love it if you could find some time to share your creation with us.  Remember, it doesn't have to be about Christmas - any song lyrics you love will do!

Happy Holidays
Susan

Friday, November 11, 2016

NOVEMBER ART ADVENTURE - "YOU'VE GOT ME IN STITCHES"

Here it is November already and we have a wonderful adventure brought to us by the lovely Annette Green who has asked us to create a project using fabric and/or stitching in some way.  Here is my project:


I wanted to create a keepsake that reminded me of my lovely maternal grandmother as she and I would sew or craft quite a bit whenever we were together.  She had an old Singer sewing machine I just loved to use.  We spent a lot of wonderful days together sewing stuffed frogs for the church bazaar, crocheting, etc.

I used Tim's doily and dress form dies for the main part of this project.  I cut the dress form out twice from brown card stock and glued the two pieces together for added strength.  I also cut one from Sticky Back Canvas and cut the top and the bottom off, adhering it to the card stock dress form.


The patterned paper I used for my base is an old "pattern" design sheet from Basic Gray.  The strips on the side are from Kaisercraft as well as the Bingo card and the "Cherished Memories " paper ephemera piece at the top.

I now decided to decorate the dress form.  I used a lovely photo of my grandmother that I cut to fit inside one of Tim Holtz's Idea-olgy Cameo Frames and adhered it inside.  I then got into my fabulous stash of ephemera from Creative Impressions and found some measuring tape twill along with a small safety pin, a Country Heart and some mini ball chain in silver.  I began by creating a necklace with the ball chain and connector and adhering this to the back of the dress form so that it wouldn't move around too much.


I then cut a length of measuring tape twill, folded it so that it would fit on the dress form's waist and used matte medium to glue it not only along my folds but also on the waist.  Then I positioned the          
with Grandma's photo over the top, hiding the folds.


The Basic Grey patterned paper and the Kaisercraft paper strips were adhered to a back panel.


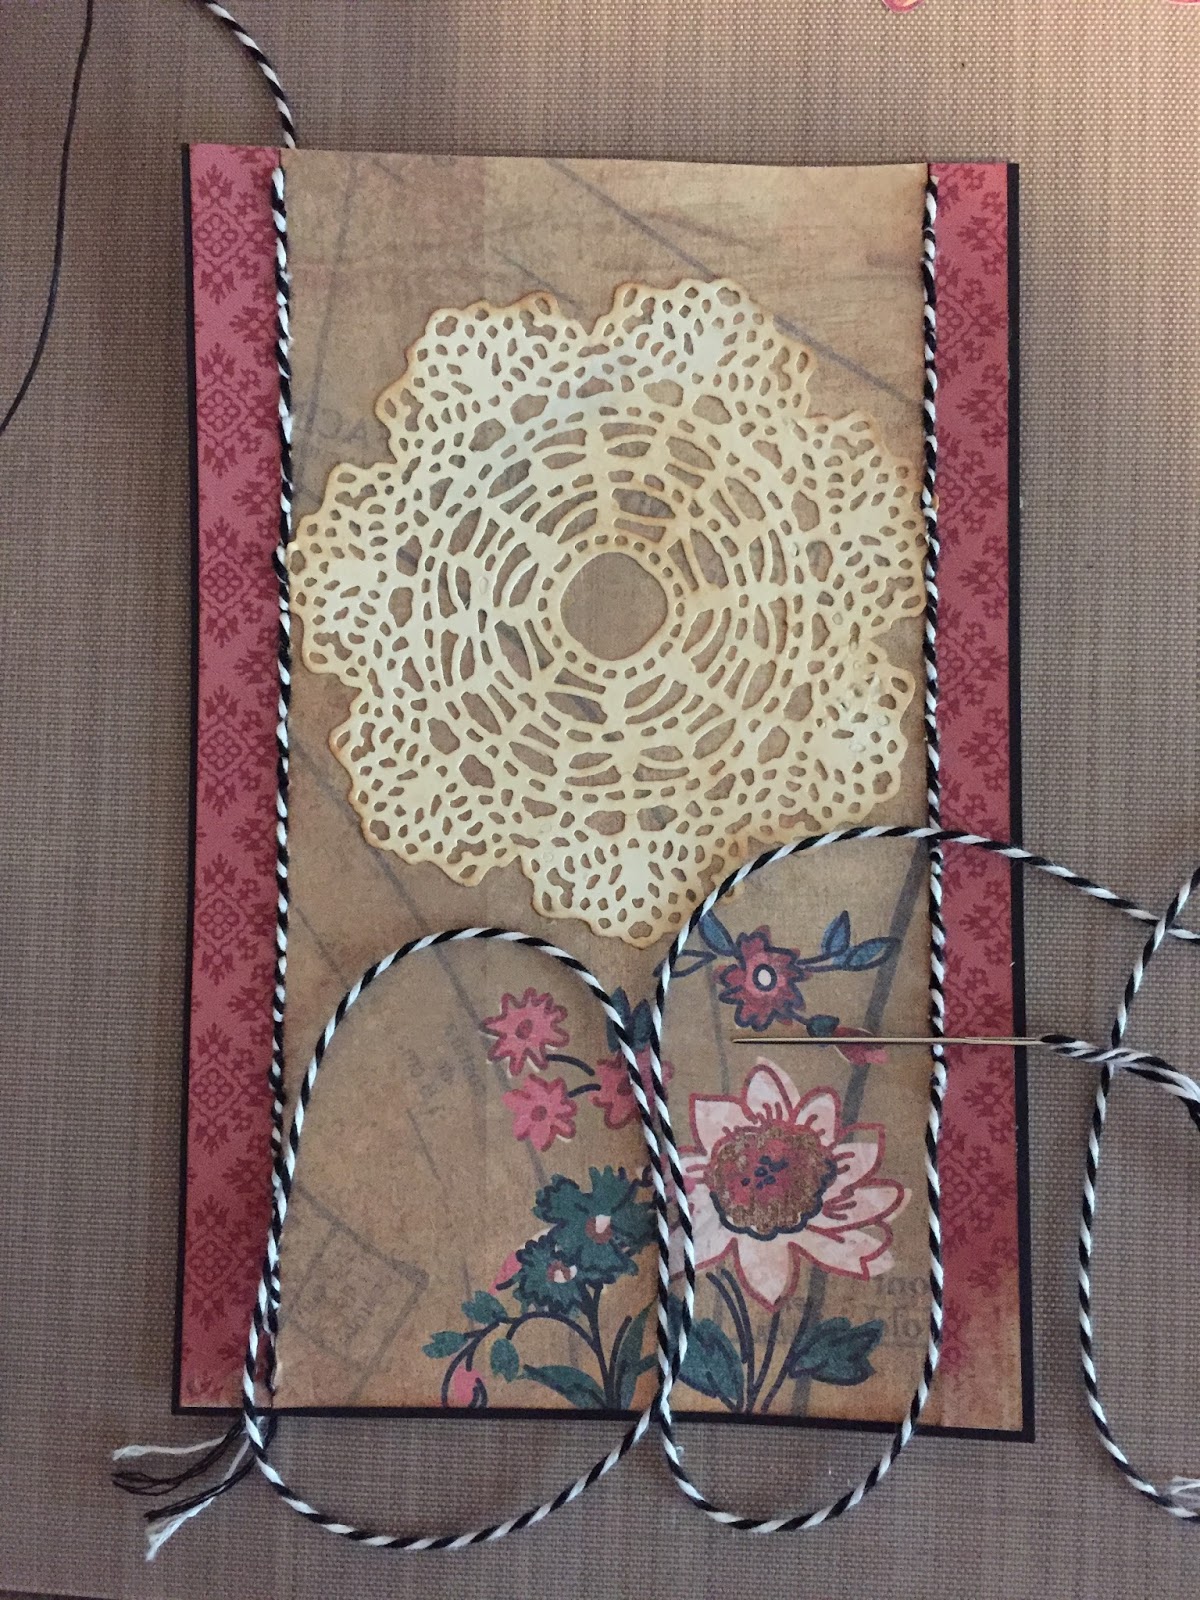
I cut Tim's Sizziz Thinlits Doily die from cream card stock and added some Vintage Photo Distress ink to "age" the doily.

For the "sewing" part of this piece, I used a template from Paper Pizazz with different stitches on it to draw in straight stitches along the area where the two different papers were attached.  I then used some Creative Impressions Baker's Twine to stick along the "seams" by hand.  I really like the way this turned out!


I added another burgundy layer of card stock and one last black layer to finish the base.

Next I added the dress form to the piece and finished decorating it with some paper flowers and Creative Impressions safety pin and Country Heart.


Now I'm thinking this may have happened to you at one point as well.  Are you lucky enough to have a friend whose "stash" is as big as yours?"  Well, I made a trip to my friend Michelle's house to see what she had.  Lo and behold she not only had that perfect paper for creating the side strips, but she also had this fabulous wooden disk with a hole in the center, paper to punch to made it look like the side of a thread spool and a bingo paper ephemera piece from Kaisercraft that were perfect!  Yay!

I also added some more paper flowers to the the upper portion of the piece as well along with some lovely lace along the top and bottom.


Now to finish it...I decided to use one of Tim's Idea-ology Display Hangars for displaying the large tag.  Michelle also had this perfect oval paper ephemera piece that expressed the perfect sentiment.  She had the idea to put it in the center of the hangar.  Love it!

I added a beautiful bow made from Creative Impressions Crepe Ribbon and I was done.  It's not hanging in my studio as a wonderful reminder of happy times with Grandma!

Now let's see what you come up with for "You've got me in Stitches"  This is a broad topic, so I know you will easily have a great project to share with us.  Make sure to return to our main site at
www.creativecartebanche.com and use the Inlinkz upload to show us your wonderful work!  Can't wait to see it!

Susan